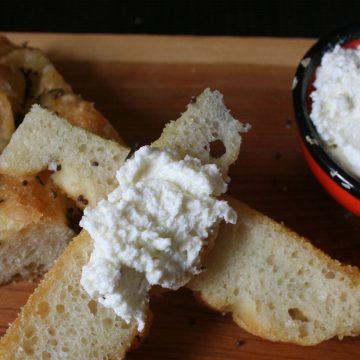
If any of you thought my choice to tell you how to make oatmeal, the simplest of meals, the other week was a bit of a cop-out, then fear not, because this week I’m telling you how to make your own ricotta cheese! How’s that for overcompensating?
Before you dismiss me as crazy, I promise this is actually even simpler to make than the oatmeal. It has fewer ingredients, involves practically no stirring and only needs about five minutes of active time (the rest can be done while you’re sleeping, or watching TV, or, I suppose, “working”). At the end of all that non-effort, you’ll have a rich, creamy, spreadable ricotta cheese that goes just as well in the layers of a lovingly crafted homemade lasagna as it will simply dabbed over a nice piece of bread and adorned with as much or as little as you like in the way of toppings.
True ricotta is actually made from whey — the leftover liquid that remains after cheese curds are made. The whey is typically heated again with the addition of acid, causing more curds to form from the remaining proteins (hence the literal translation of ricotta, which is “re-cooked”). The recipe here actually uses whole milk, but still uses heat and acid to create curds that are then drained. The result is more similar to a queso fresco or a paneer in terms of method, but authentic or not — it far surpasses most of the commercial ricotta cheese I’ve ever had in flavour and texture. Furthermore, according to our friends at Serious Eats, most commercial ricotta is treated with chemical stabilizers rather than drained properly, which is why you will often get a gritty, separated cheese when you try cooking with it. Due to the draining time you apply here, you can avoid this mess altogether — your cooked ricotta will retain its smooth and creamy texture if you choose to use it in a hot dish.
Either way, you literally need nothing here but whole milk and cream, some lemon juice, some cheesecloth or paper towels and a bit of time. Heat the milk, add the acid, strain it and you’re good to go. What you do after that is completely up to you, but a few of my favourite ways to eat ricotta are as follows, in varying degrees of complexity:
-
spoon over lightly toasted foccacia bread or a crispy flatbread, drizzle with good honey, season with sea salt and fresh ground pepper
-
spread on crostini and top with fresh summer peaches and slices of salty prosciutto
-
mix with a bit of olive oil, salt and pepper and add a large dollop of that business to any tomato-based pasta dish
-
stir in some fresh summer herbs (basil and mint work great), and lemon zest, stuff the mixture gently into some fresh zucchini blossoms, dip in batter and fry
Homemade Ricotta Cheese
Adapted slightly from smittenkitchen.com
Makes about 1 cup
3 cups whole organic milk
1 cup 10% cream (or heavier, if you like)
½ teaspoon kosher salt
3 tbsp fresh squeezed lemon juice
Equipment: a few layers of cheesecloth or a couple paper towels
1. Put the milk, cream and salt into a large, nonreactive pot. Heat the milk on medium heat to scalding — just below the boiling point, so it’s really steaming but not yet bubbling (or between 165F–185F on a candy thermometer, if you’ve got one). Don’t forget to stir occasionally to keep the milk from burning on the bottom of the pan.*
2. Remove from heat and add lemon juice. Stir the mixture gently once or twice only — you will see curds beginning to form. Let the pot sit, undisturbed, for five minutes.
3. Line a strainer with a few layers of cheesecloth while you wait, and set over a bowl. You can use paper towels if you don’t have cheesecloth. Pour the whole mixture into the strainer and allow the curds to drain. The length of draining time depends on the consistency you want; half an hour will give you a softer version, good for spreading or spooning onto things. A full two hours will give you firmer curds that are better for pastas and stuffing things. Your ricotta should keep up to five days in the fridge, depending on how fresh your milk is, but you won’t need that long.
*the nerds at Serious Eats have found a way to make this even faster by microwaving the milk for 2–4 minutes. I haven’t tried it yet, but go forth and nerd out if you want.
Sara Chan is a Toronto-based entertainment lawyer, food enthusiast, unprofessional home chef and even less professional food photographer. Her favourite food group is pork.


