Food trends, like fashion, are cyclical. Some of them I can get behind (cupcakes, tacos, food trucks — yes, please!). Others I can do without, especially when they’re ideas that weren’t so special to begin with the first time around, only to be resurrected at some ridiculous price point. So, just as I am not particularly thrilled to witness the return of acid wash denim (this time, at designer prices), I have generally been pretty uppity about the comfort food revival that’s swept many Toronto restaurants lately.
That’s not to say I don’t love comfort food — even if you’re serving “refined comfort food” and you’re turning out a well-made, delicious dish that plays on something familiar and nostalgic, I’m all for it. But I also don’t need you to take mac and cheese, throw in some truffles and foie gras, charge me $30 and ruin everything. Also, stop putting lobster on poutine. And short ribs. We’re not America, we should know how to put together a poutine. Amiright guys?
So, I have to say that during a recent dinner outing at The Emerson, a lovely joint gracing the usually sad corner of Bloor St. and Lansdowne Ave., I was concerned when I saw icebox cake on the dessert menu. First, we thought it might be an ice cream cake, which was exciting for everyone. Obnoxious-Googling-at-the-table indicated that it was actually a cake originating in the U.S. during the 1930s that essentially took chocolate wafers layered with whipped cream formed into a log, which you put in the icebox (read: old-timey name for “fridge”) overnight. The result is actually like a fancy layer cake, because the whipped cream softens the cookies overnight so they take on a cake-like texture. This sounded good. But what were they going to do to it to class this thing up?
“What’s the deal with the icebox cake?” we asked. Our server explained it as “chocolate cookies smushed together with whipped cream and then put in the fridge.” We waited for further explanations — salted caramel foam? Some kind of molecular candy brittle on top? “It’s super trashy,” he said, when it was clear we needed more information. We ordered it. It was amazing. We should all make it and go buy some Hammer pants.
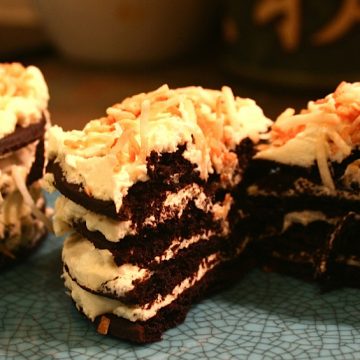
The classic icebox cake uses little other than Nabisco’s Famous Chocolate Wafers (in Canada, Mr. Christie’s Chocolate Wafers), and some sweetened heavy whipped cream. But there is no shortage of variations on the cookie (vanilla wafers, ginger snaps, graham crackers) and the filling (additions of peppermint extract or vanilla, adding layers of lemon curd or chocolate mousse, etc). The shape of it can also vary widely — from the classic “log” style to layering it free-form or into round or square cake pans. I opted here for individually sized portions, but you can make as few or as many as you like, and also, they’re kind of adorable. Play around with this recipe however you want — the Internet abounds with fun ideas — however, the classic will give you a light, dreamy cookies-and-cream effect that really doesn’t need much else. I might be inclined to adorn these with some candy sprinkles if this were for a kid’s party, some bittersweet chocolate shavings or toasted coconut for a more adult feel, or some crushed up leftover wafers to add some crunch, but that’s about it.
Mini Icebox Cakes
Makes 10 cupcake-sized cakes
1 sleeve Mr. Christie’s Chocolate Wafers
2 tablespoons icing sugar
1 teaspoon vanilla extract
2 cups heavy whipping cream
Topping of your choice (optional)
10 cupcake liners
1. Whip the cream with the sugar and vanilla until stiff peaks form. You definitely want a stiffer whipped cream — too liquidy and the cookies will get too soggy and your cakes will fall apart.
2. Arrange cupcake liners on a large plate or in a shallow container that will fit in your fridge. Assemble by topping one wafer with about 2 teaspoons of cream, then putting another wafer on top. Repeat until you have a stack of four wafers, with a final dollop of cream on top. If you want, you can also coat the sides with whipped cream so it’s entirely iced.
3. Place assembled cakes in the fridge for at least 4 hours or overnight. You want the wafers soft enough that you can slice through them easily with a spoon. When ready to serve, sprinkle tops with topping of choice, if using.
Sara Chan is a Toronto-based entertainment lawyer, food enthusiast, unprofessional home chef and even less professional food photographer. Her favourite food group is pork.


