

Has anyone ever asked you what you would do if you weren’t a lawyer? My answer is simple. I would be an interior designer. I would spend my days perusing fabric and paint samples, styling bookshelves and mantles, purchasing designer pillows…
Alas, I am not an interior designer. I’m counsel at an insurance company. I am also a recent homeowner. (That’s right — my spouse, a handsome lawyer at BLG, and I tackled the Toronto real estate market and emerged victorious, if somewhat broke.) And suddenly all that spare time reading home magazines and blogs, visiting West Elm and EQ3, attempting DIY projects and scouring HomeSense and flea markets has a real purpose. I’ve basically got to decorate an entire house without spending any money.
Between the pre-inspection dollars, bully offers and bidding wars, our budget for home decor is pretty much non-existent. Our basement needs finishing, the kitchen needs updating and don’t even get me started on the bathroom (the toilet wobbles when you sit down).
Saving for these big-ticket items has forced me to be very smart about where I spend my design dollars. To that end, I’m DIY-ing, picking up pieces from Craigslist and reinventing old furniture with a splash of new paint. I colour-dip, spray-paint and Ikea-hack. If it looks good and it’s wallet-sensitive, I’ve likely tried it and/or bought it.
My goal for this column is to help you find your own inspiration through my adventures in interiors. I’ll show you some great online resources I use for my art and pieces for the home. I’ll help you use cheap-and-easy interior design apps to create your own mood boards and visions for your own spaces. I’ll show you step-by-step DIY projects that I’ve attempted and even attempt some of yours if you’d like! I’ll share photos of my purchases (the good, the bad and the disastrous) and be frank with where I found the pieces and for how much. I encourage open communication lines with you, my darling readers (I am a lawyer after all) and will be happy to answer any of your design questions. Feel free to tag and follow me on Instagram at @emmaintoronto to stay up-to-date on all things interior.
For my first column, I want to show you my most recent (and proudest) design moment: my red door. Ever since moving to Canada from Australia and seeing those beautiful old homes tucked away in the tree-lined streets of Toronto, I have wanted a red door on my house. The look of red paint against red brick seems, to me, classically Canadian. Last month, I headed off to my local paint shop to get started. When I arrived, I declared to the man behind the counter: “I want to paint my front door red! Please sir, what do I need?” He looked at me blankly and said: “You need to hire a professional.”
He obviously had no idea who he was talking to.
I ignored his comment and went on to an incredibly successful three days of door painting (and when I say “I,” I mean with generous help from Dad, staying with us on vacation from back home).
The result? Elizabeth Arden, eat your heart out:
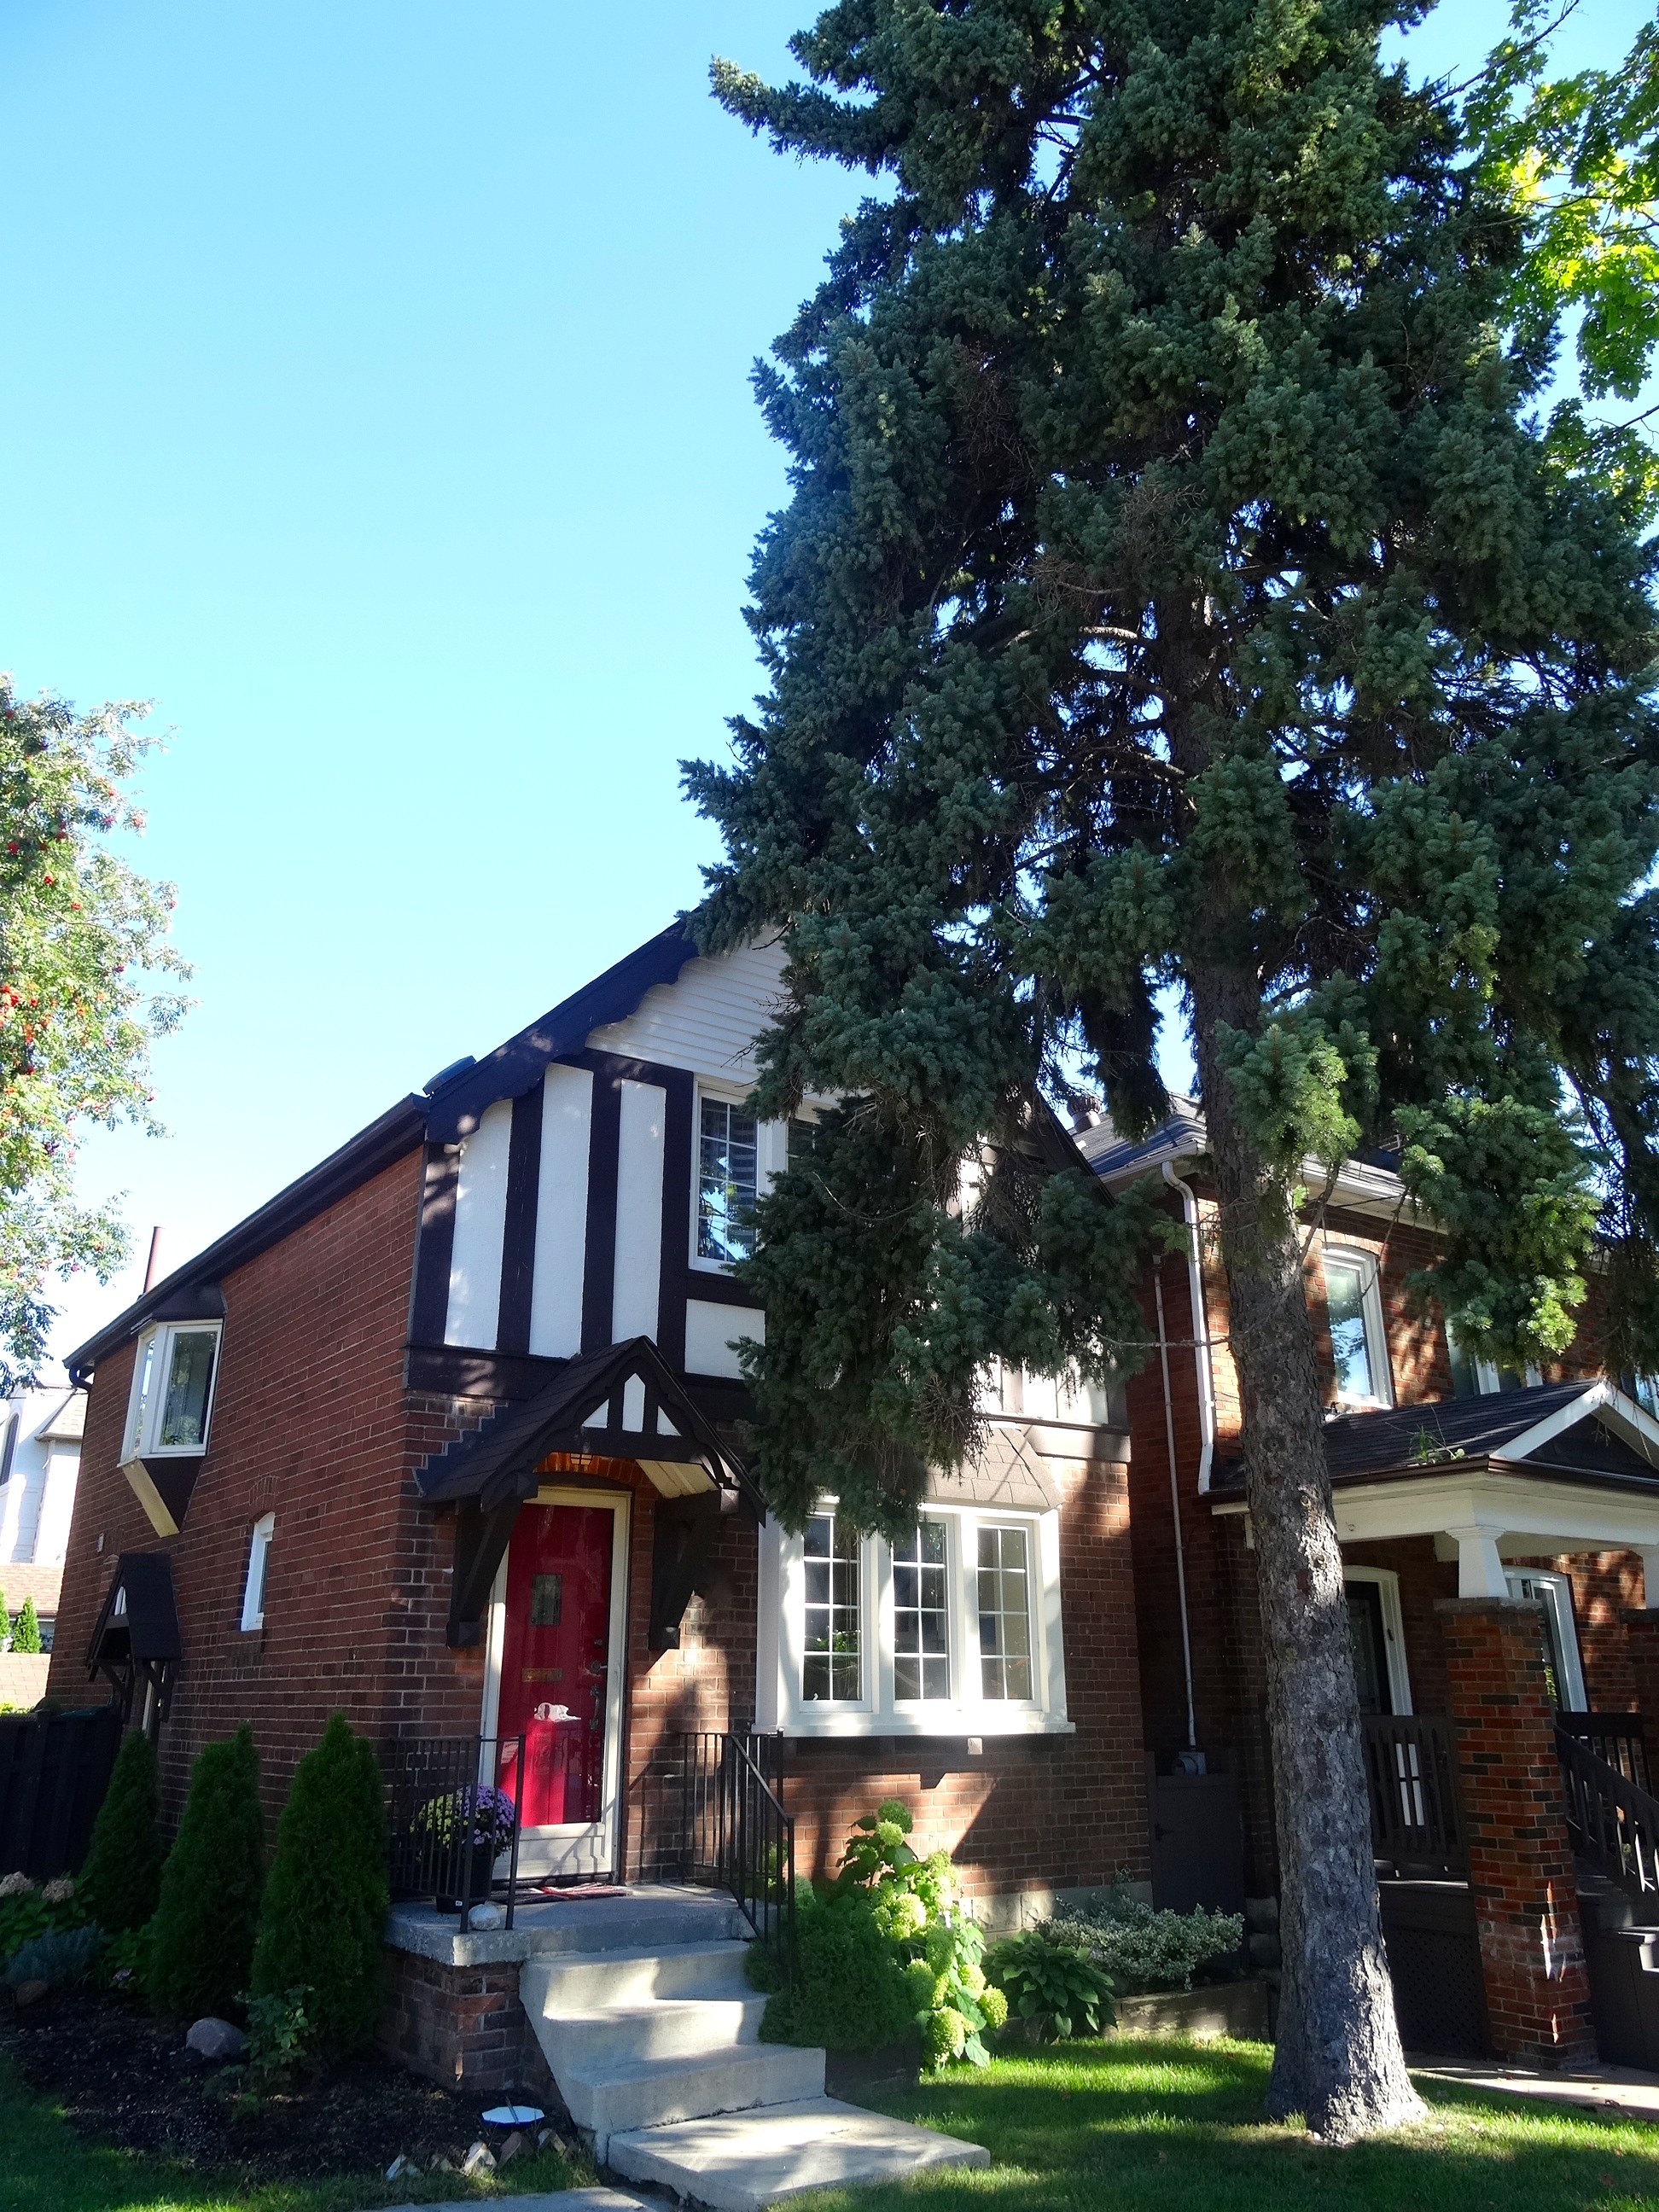
The Before Shot
The After Shot

My Tips for Painting your Front Door
Do
- Do be adventurous with colour. Some people change their door colour every season: orange for fall, red for winter, blue for spring and yellow for summer. If you are less inclined to switch it up that often, pick a colour that speaks to the spirit of the house. My go-to colours include: red (cherry, blood, deep), black (charcoal is super chic) and blue (indigo, sky and navy are my top choices).
- Do remember it’s just paint. If you hate the colour, you can paint over it!
- Do try to begin the project on days where the forecast is clear and dry (preferably). This project will take you anywhere from 2-4 days depending on how many coats you do.
- Do prime your door properly! Preparation is the key to success with painting. I can’t say it enough, prepare, prime, prepare. Speak to your local paint supplier for the right colour primer to use.
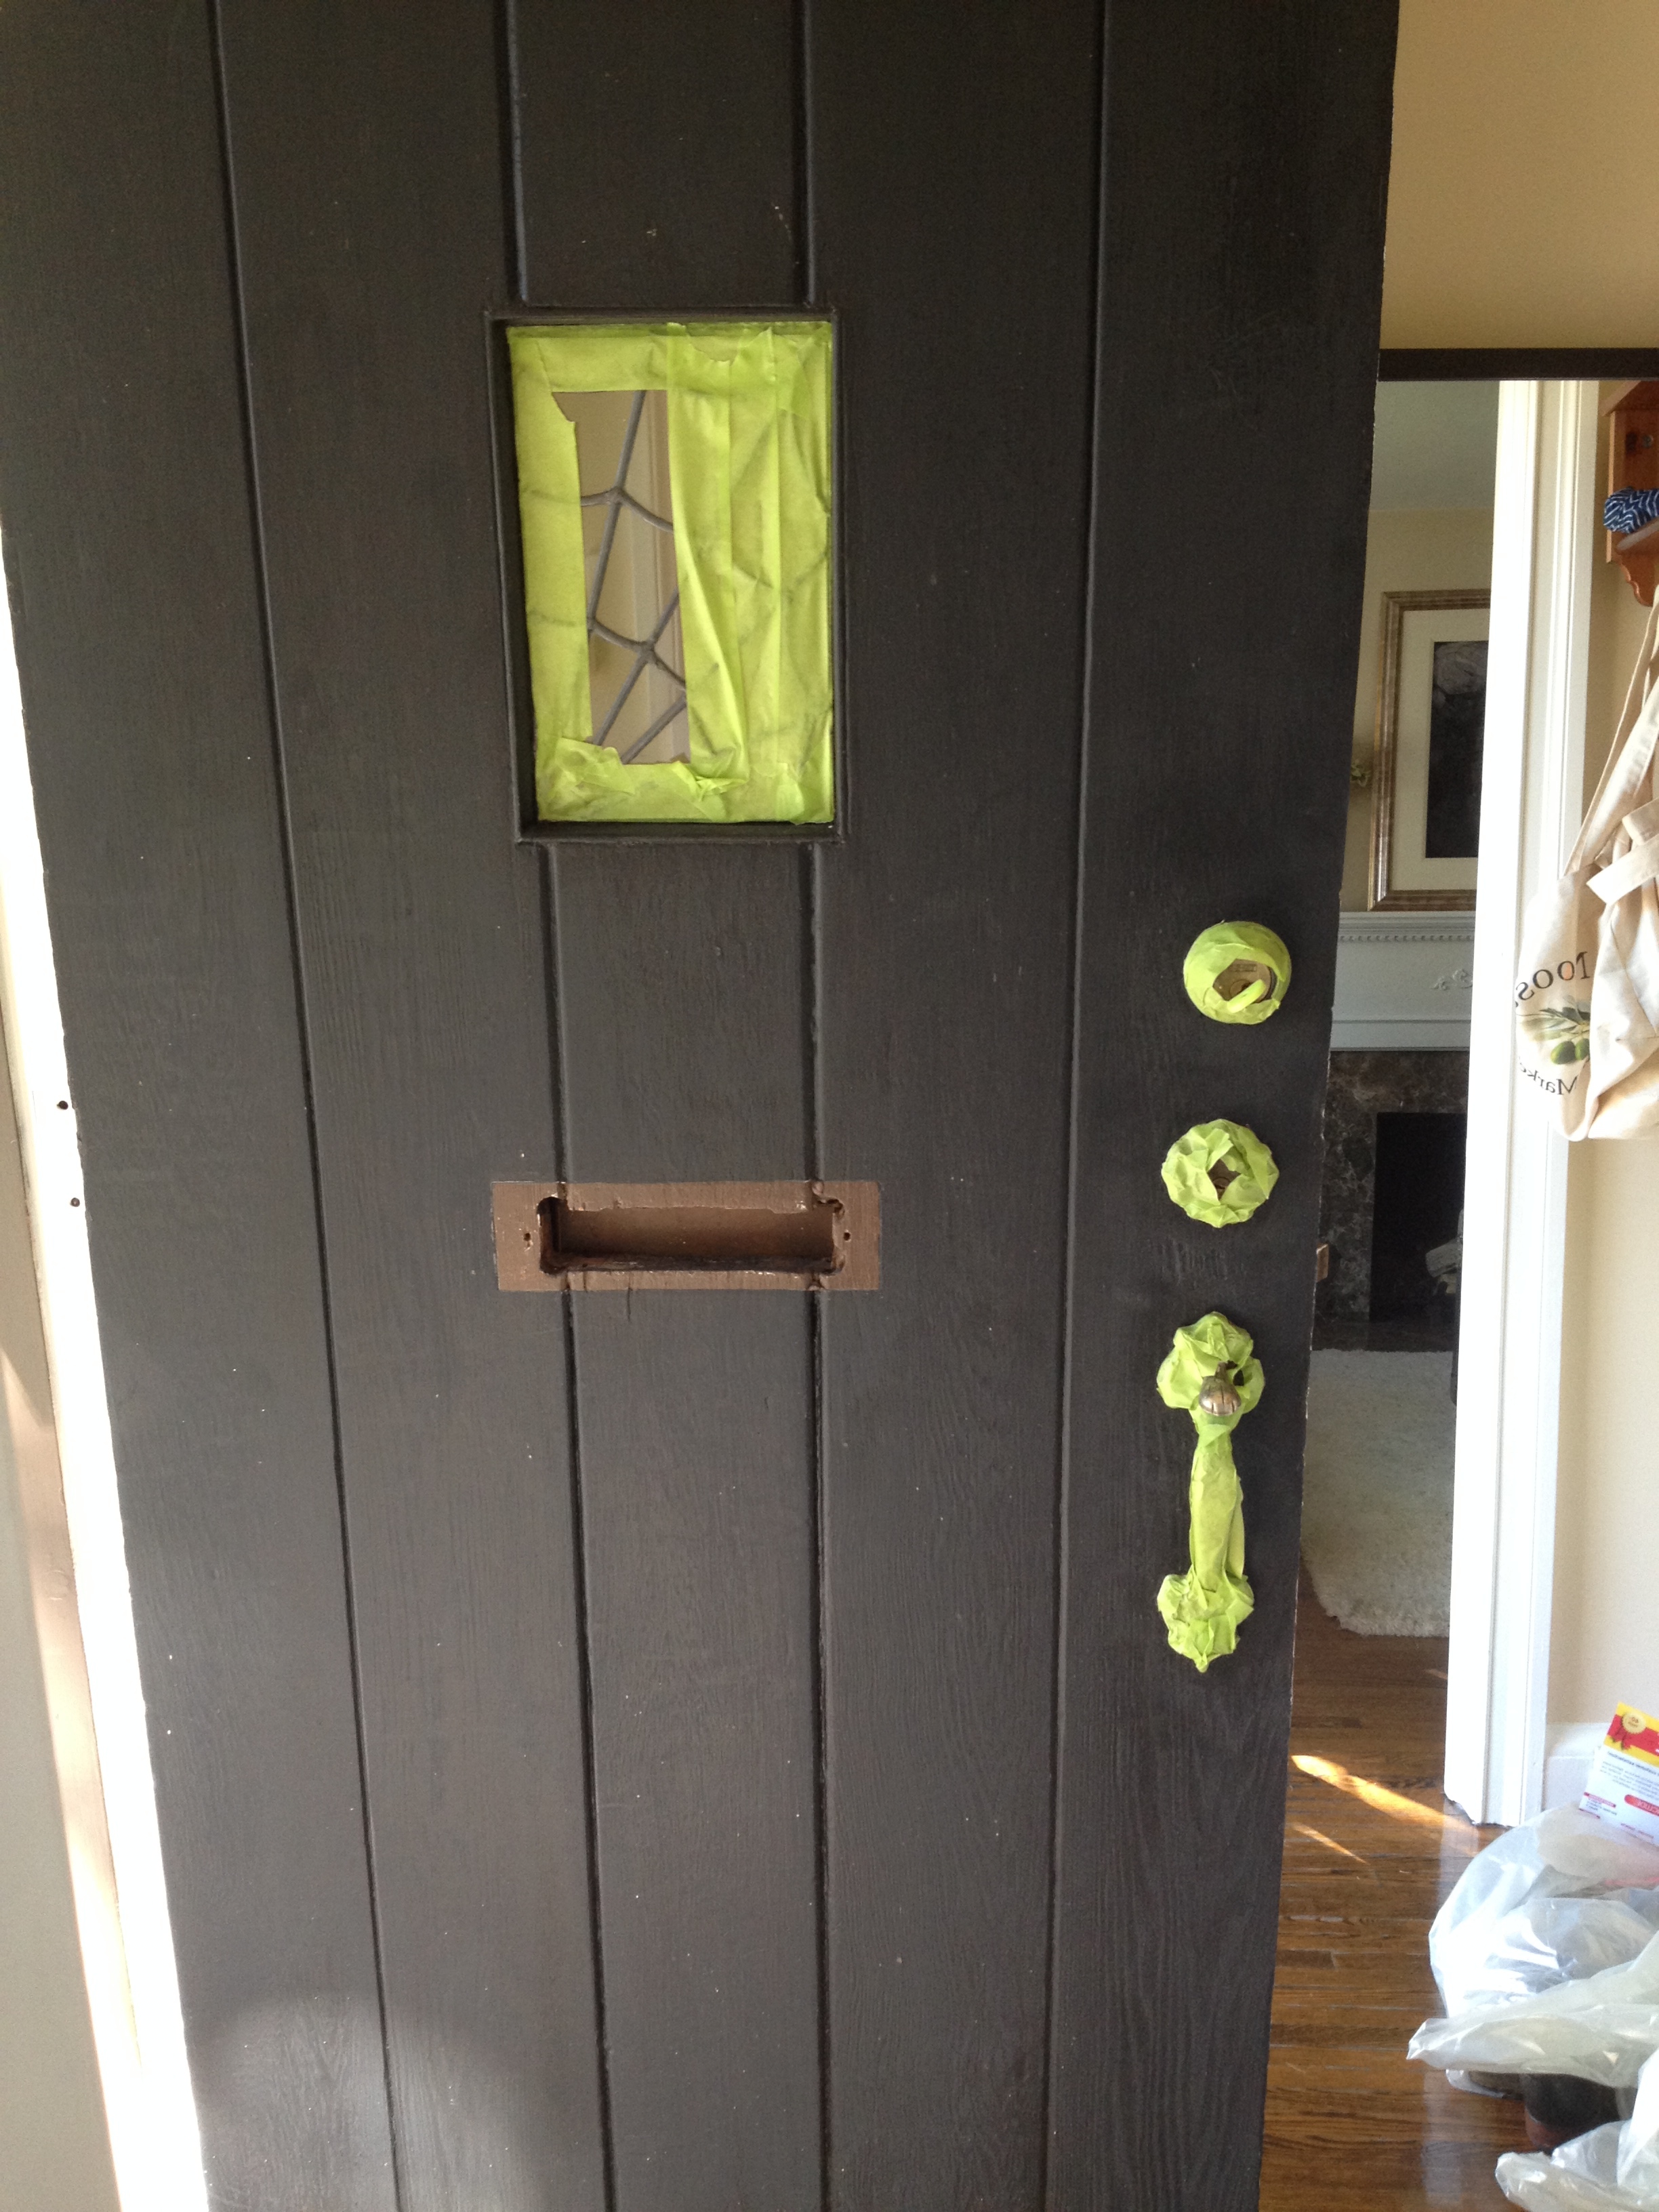
- Do be patient — painting takes time. Wait until each layer of paint has dried completely before applying the next. I did two coats of primer and three coats of paint. My door took three days in total from start to finish due to drying time.
Don’t
- Don’t remove all your hardware if you don’t have to! They don’t make locks like they did 85 years ago and you may not be able to get it back on. Instead, spend the time “frog-taping” all of your glass/handles/hardware. Trust me.
- Don’t work without a protective mat on the ground. You will spill paint on your hardwood floor and you will cry if it’s not protected.
- Don’t paint the back of the door. The impact is meant to be street view, not from your adjoining living room.
- Don’t start the project at night time or if you are going out. You can’t close the front door — it’s going to be wet with paint!
- Don’t listen to the paint man who tells you can’t paint the door yourself – you totally can.
Watch this video for more great tips: